Notch for Blum Undermount Drawer Slides
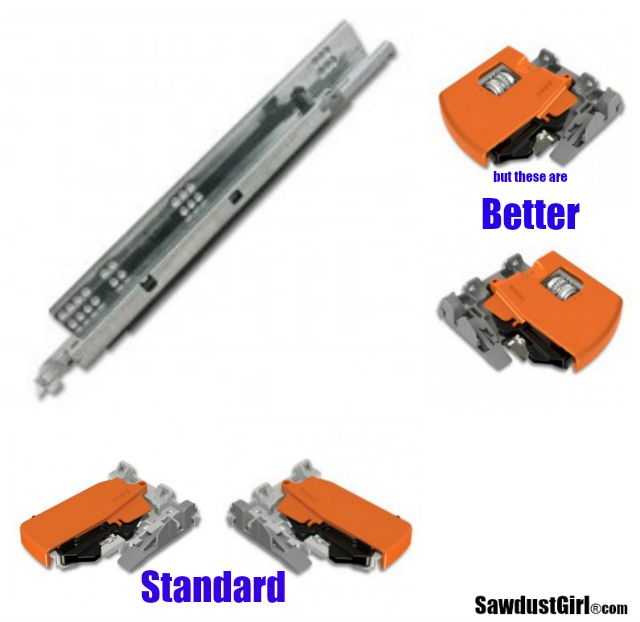
Blum installation instructions leave a lot to be desired but the hardware is great. I pretty much always use Blum Tandem plus Blumotion for my drawer slides. Once you learn how to make sense of the drawer sizing instructions, Blum drawer slides are much easier to install than side mounted drawer slides. Once your drawers are build, Installation is a breeze.
How to Build a Drawer for Blum Drawer Glides
Every time I install these Blum drawer runners I have to look up the installation guide, FIND the section on notching and boring for the drawer runner and then translate the metric measurements into imperial so my brain will recognize what the instructions are telling me to do. They finally started including metric and imperial measurements so I don't have to translate. Yeah! But when I look at this diagram, it makes my head spin a bit.
I think it could be done better. I need an instructions that make sense to my brain so I created the following instructions for anyone (including myself next time I need this info) to use when they are picking out drawer runners and then figuring out how to notch and bore for the locking mechanism.
Locking mechanisms
You have to order a right and a left locking mechanism for each drawer slide pair you purchase. (The slides come in pairs. The locking mechanisms are sold individually.)
So, make sure that for EACH drawer you are building you order:
- 1 pair of drawer slides (sold as a pair)
- 1 Left locking mechanism
- 1 Right locking mechanism
- Screws (I use #6 1/2″ for locking mechanism and #8 5/8″ for drawer slide)
I shop around for the best price whenever I need a new batch.
Important: You have to order the correct glides for the thickness for the drawer material you are using. Most of us build drawers with 1/2″ to 5/8″ thick material. The instructions in this post are specifically for the 563H Drawer runner for 1/2″ -5/8″ material!
*Also, the Blum drawer runners come in 3″ increments. Decide which runners will work in your cabinet and then build your drawer the same length as your runners.
Size your drawer
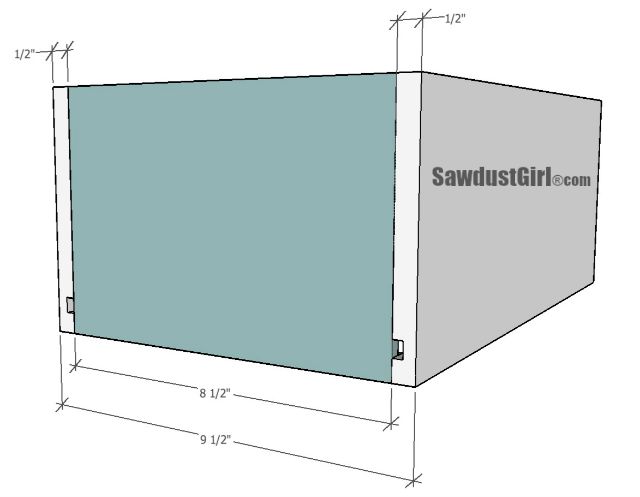
- Measure your cabinet opening.
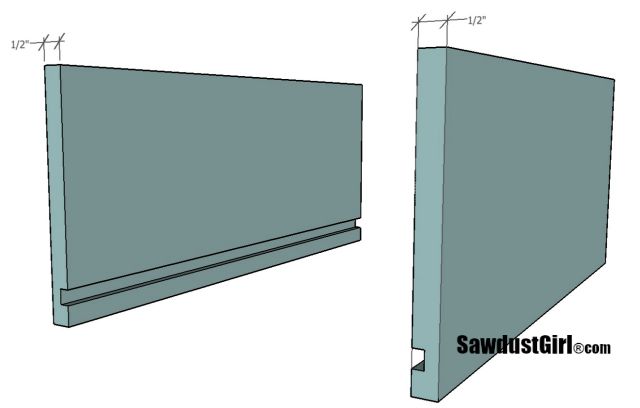
- Easy interpretation of the below Blum diagram: If you're using 1/2″ plywood to build your drawers, subtract 5/8″ from your cabinet opening to determine the outside width of your drawer.
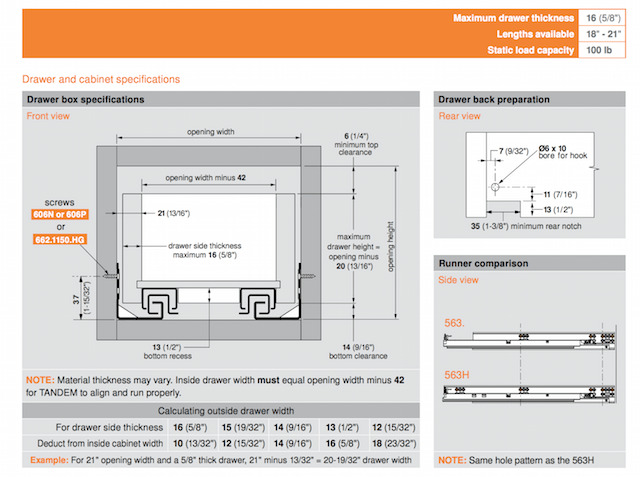
The sides should extend the full length of your drawer. The front and back should be installed INSIDE your sides. With 1/2″ plywood, the math for the width of your drawer front and back is easy — subtract 1″ from the outer width.
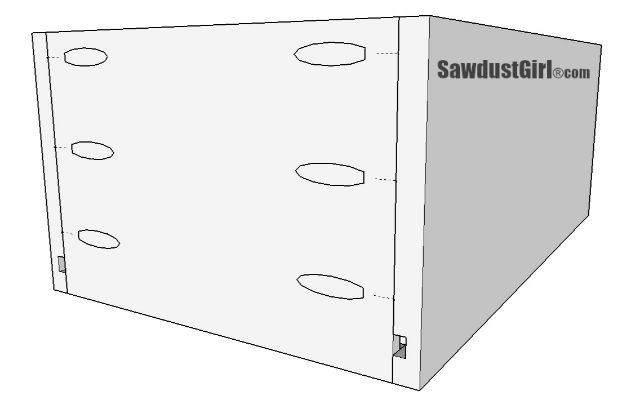
The front and back parts can be attached to the drawer sides in a number of ways: the easiest of which are loose tenons, dowels or pocket screws.
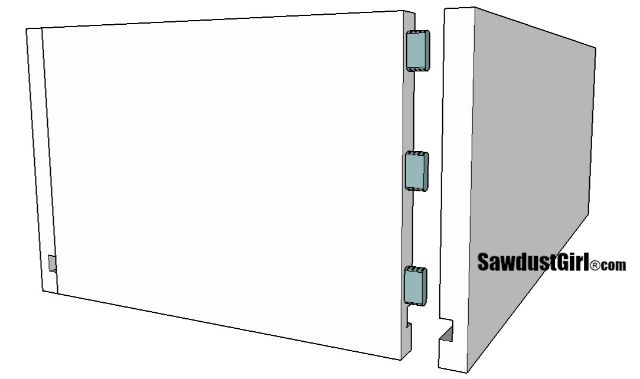
Most people have a pocket hole jig so that's what I'm using for this tutorial.
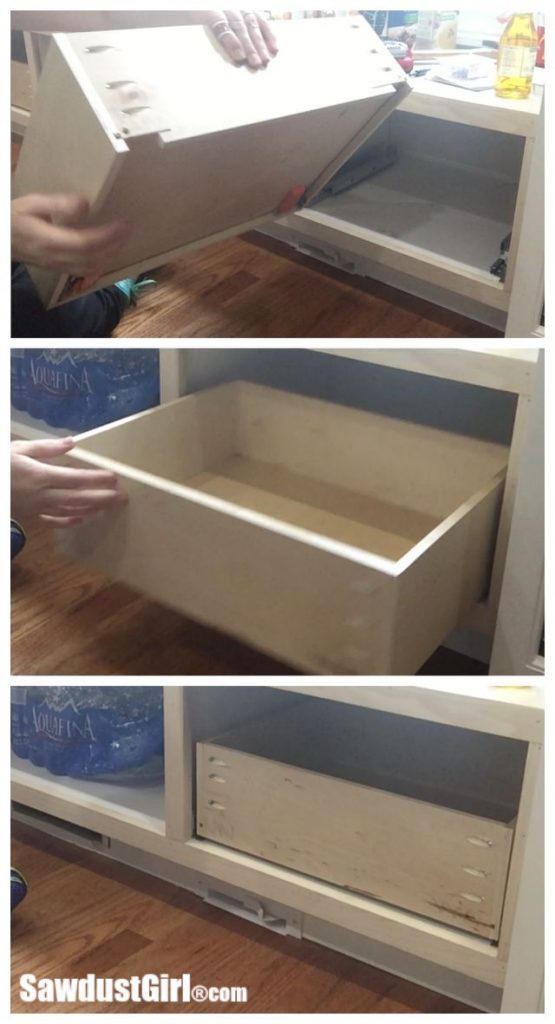
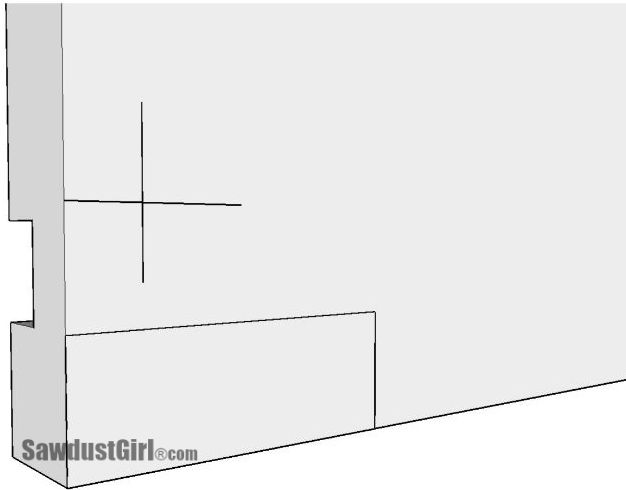
Prepare the drawer back for the drawer runners.
Before you build your drawer, you need to prepare the drawer back. It's easier to do this before assembly than after. You need to drill a 1/4″ hole and cut a notch for your drawer glide. You need to do this on both the right and left side of your drawer back. I have a tutorial for the Blum hole drilling jig I created. It holds the drawer back and allows one to drill the hole in the exactly correct location without measuring for every single hole.
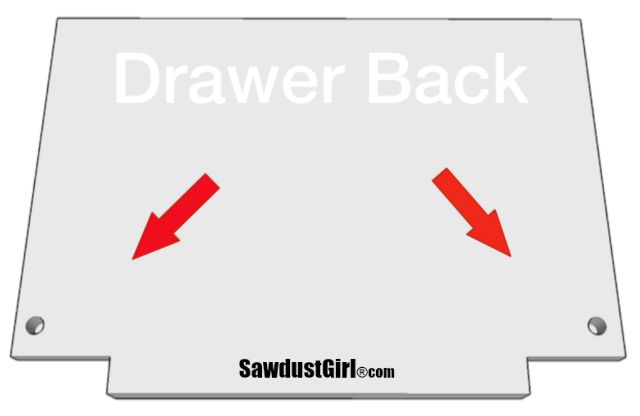
Make sure you are doing this on the BACK side of the drawer back. The groove for the drawer bottom is on the inside of the drawer. The opposite side of that groove is the drawer back (and the bottom of the drawer back — back.)
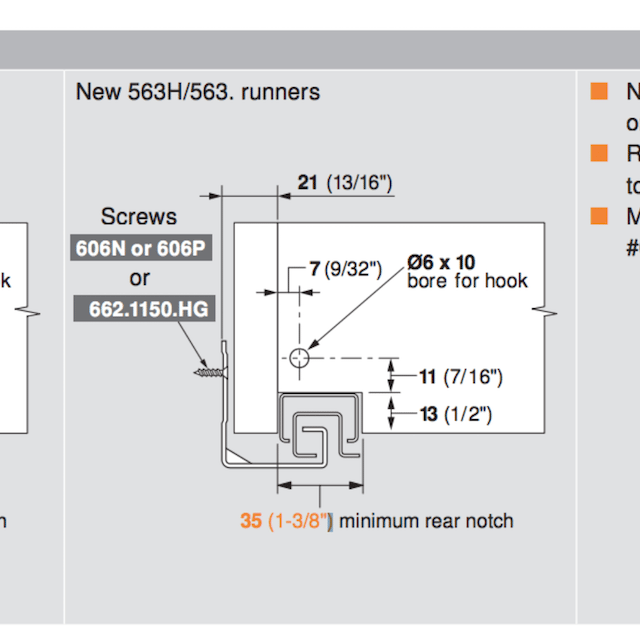
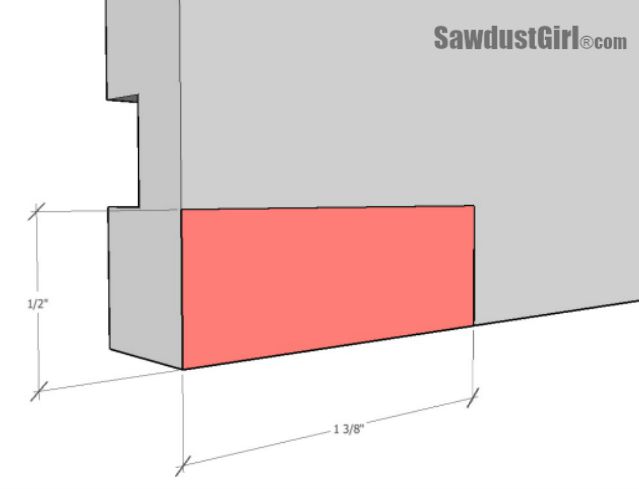
IMPORTANT: 563H Drawer runner is for 1/2″ -5/8″ thick drawer material and that is what these specific notching and boring measurements are for.
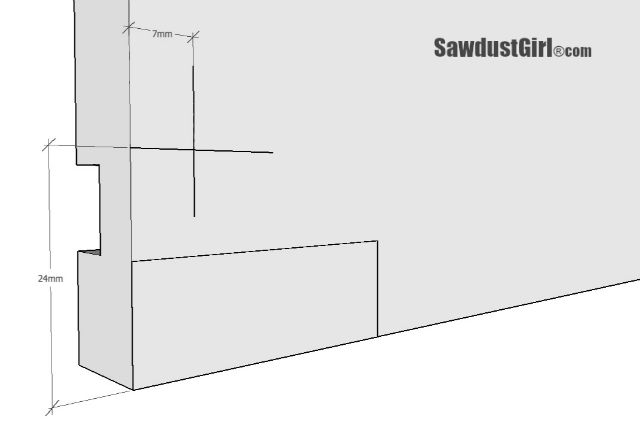
The notch you'll need to cut out is 1/2″ tall by 1 3/8″ wide (minimum). You can cut that out with a jigsaw.
The 1/4″ hole you need to drill out is as shown below. 9/32″ is difficult to find on a tape measure so I find it easier to use a metric ruler for this part.
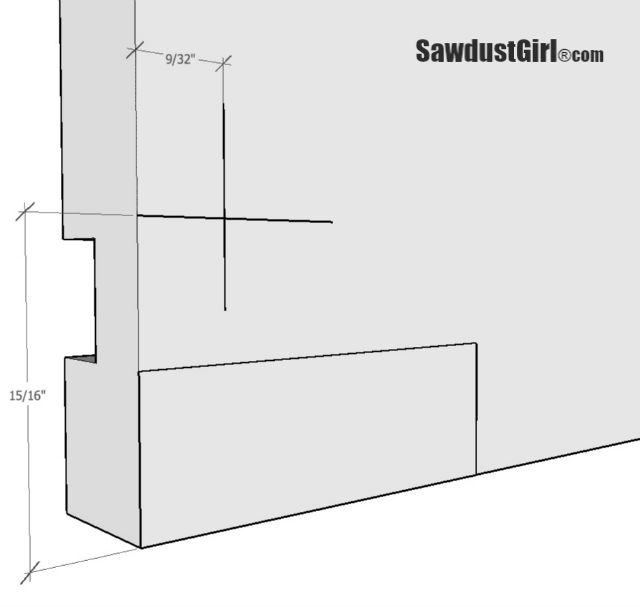
7mm over and 24mm up is easier to find on a metric ruler.
You can even print out the PDF versions of my drawings for convenience.
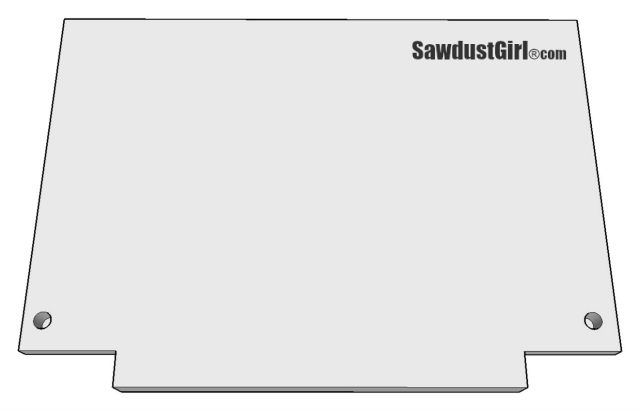
- Bottom notch
- Location for hole
- Location for hole in mm
Build your drawer
Using floating tenons, dowels or pocket screws. Make sure you DO NOT drill a pocket hole on or too near the groove for the drawer bottom. If you drive a screw in the groove, the drawer bottom will not slide into place.
When you're drawers are built and you're ready to install, check out my tutorial and tips for installing drawers with Blum Tandem with Blumotion drawer slides.
Notch for Blum Undermount Drawer Slides
Source: https://sawdustgirl.com/how-to-choose-and-use-blum-tandem-plus-blumotion-drawer-runners/
0 Response to "Notch for Blum Undermount Drawer Slides"
Post a Comment