How to Create a Hanging Indent in Microsoft Word
How to Create a Hanging Indent in Microsoft Word
Creating a hanging indent helps you format bibliographies, citations, and references.
What is a hanging indent?
A hanging indent is created when your first line in the paragraph starts at the left margin and the subsequent lines start indented, or spaced, from the second margin. This keeps the information aligned and makes it easier to read. They are also used for bulleted and numbered lists. Let's take a look at how to create a hanging indent on Microsoft Word,
How Do I Create a Hanging Indent In Word (Cheat)?
- Highlight the text/paragraph and Press on Ctrl+T to create a new hanging indent. If there are no explicit tab stops on the text, Word will automatically indent to the next default tab stop, which is usually 0.5". Each subsequent press of the shortcut indents the hang one more tab stop.
- You can also press Shift+Ctrl+T to undo the hanging indent you just made.
This is the easiest way to create a Hanging Indent in Word for your Works Cited page.
This can also be used to create an Indent on your MLA or APA works cited list in Microsoft Word. If your works cited list has many entries, you can keep using the hanging indent for additional lines. This is used for properly formatting bibliographies, reference lists and works cited pages to make each entry easier to read and understand.
How to Make a Hanging Indent on Microsoft Word for PC
This will help you answer the question "how do I indent my references on Word?. These simple steps are helpful for creating Hanging Indents on Word 2010, 2013, 2016, 2019, and Microsoft 365.
- Open the document and select the paragraph or text you wish to indent.
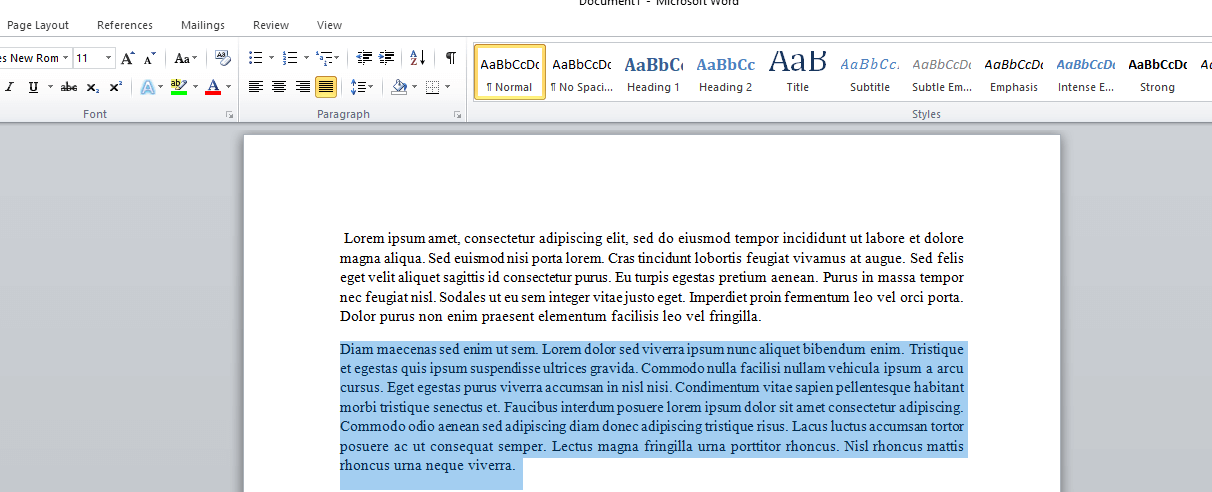
- Go to the Home tab, navigate to Paragraph and select the dialog launcher

- Click on the Indents and Spacing tab in the Paragraph dialog box.
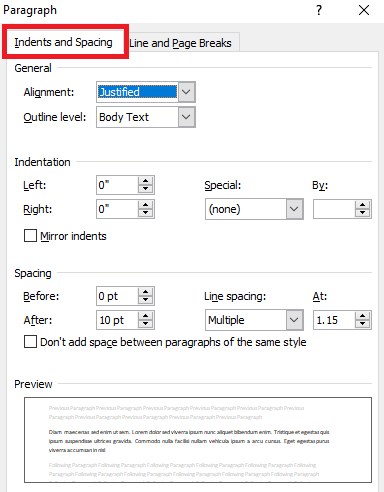
- Navigate to the Indentation section and choose Hanging from the Special drop-down list.
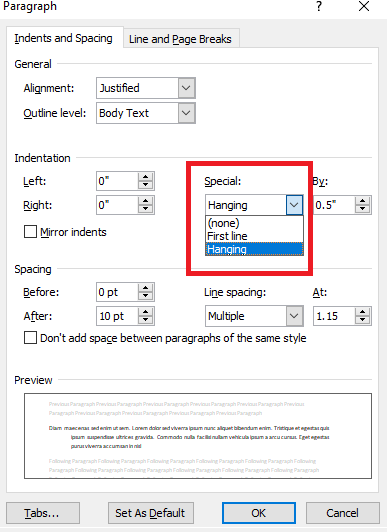
- In the By section you can increase or decrease the indent spacing, by default it's 0.5 "

- You will see the Preview section at the bottom of the dialog box, this shows you how the text will look.
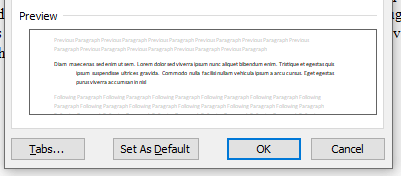
- Click on Ok . Now you have successfully added a hanging indent to your text!
You can also create hanging indents by doing these simple steps.
- Select the paragraph or text you want to indent.
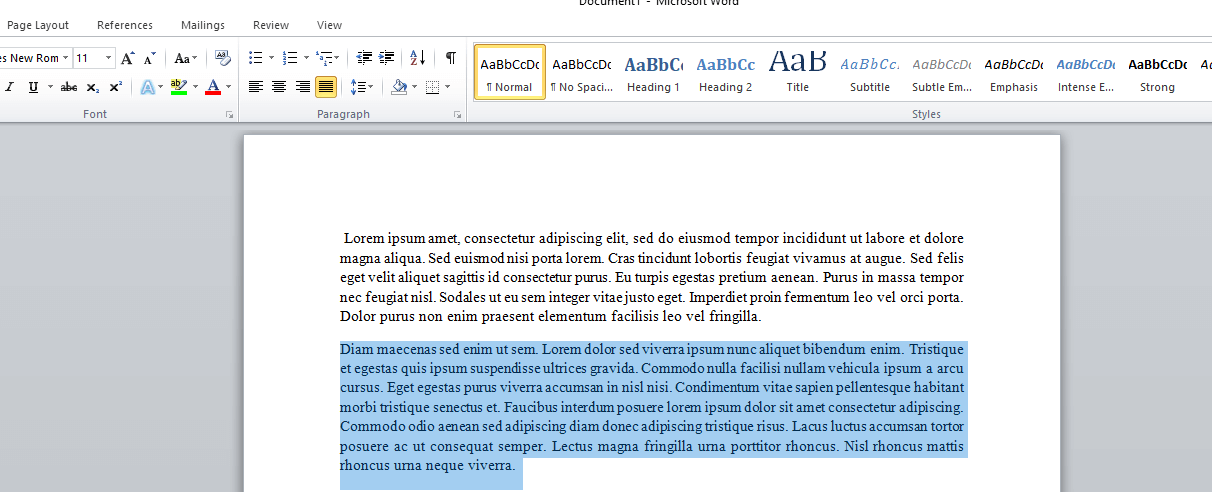
- Right-click on the highlighted text and choose Paragraph.

- Click on the Indents and Spacing tab in the Paragraph dialog box.

- Navigate to the Indentation section and choose Hanging from the Special drop-down list
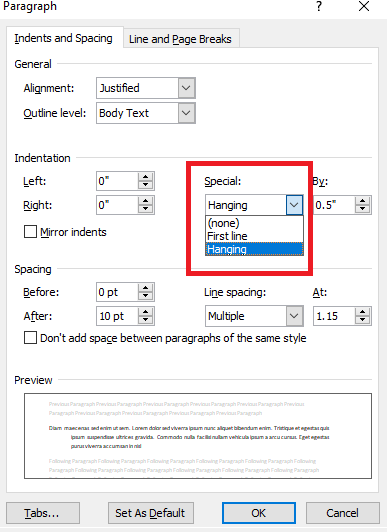
- In the By section you can increase or decrease the depth of the indent, by default it's 0.5"

- You will see the Preview section at the bottom of the dialog box, this shows you how the text will look.
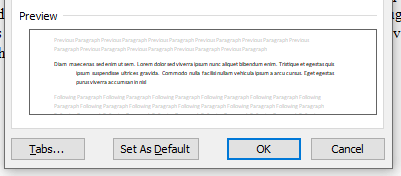
- Click on Ok and voilá!
How to Make a Hanging Indent on Microsoft Word for Mac
The steps for creating a hanging indent on Mac are similar to those for PC. Let's take a look at them:
- Select the paragraph or text you want to indent.
- Navigate to Format and select Paragraph

- Look for the Indentation section and choose Hanging from the Special drop-down list.
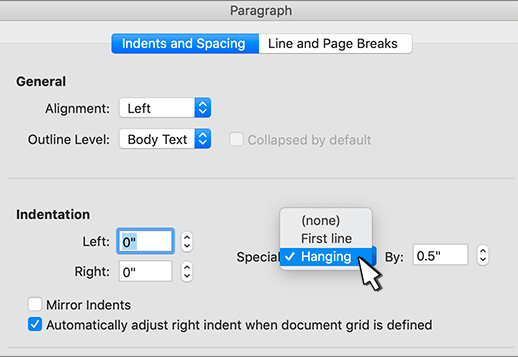
- In By section you can increase or decrease the depth of the indent, by default it's 0.5"
- C lick on Ok to finish the hanging indent.
How to Make a Hanging Indent on Word for Ipad or Mobile Devices.
If you are using a mobile device or are on the go, fear not, you can still use indent on your texts or references. The steps are similar to the ones discussed above. Here is a quick rundown of them:
- Open the document you want to edit
- Touch the view and turn on the ruler

- Select the text you want to format
- Drag the bottom rectangle to the right in order to move the highlighted text to the right

- Drag the upside-down triangle to the left or right to move the first line of each paragraph.
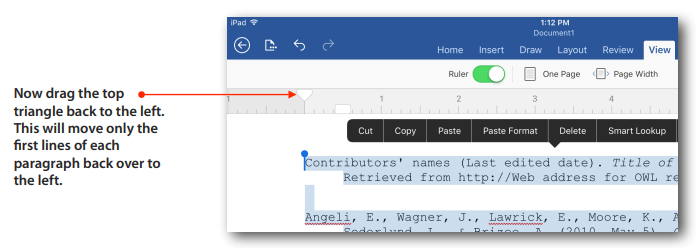
(Credit Source: LutheranHigh)
How to Make a Hanging Indent On Google Docs
You can also be in the need of making a hanging indent on Google docs. If you're wondering how to create a hanging indent in Google Docs, then we've got you covered. It also applies to the mobile version of Google Docs for Android and IOS. Follow these simple steps:
- Click on View and make sure the Show ruler option is checked.
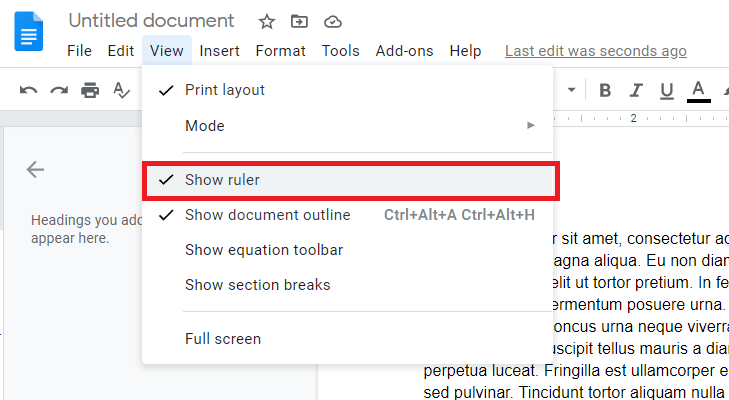
- On the ruler, located at the top, you will see a blue upside-down triangle and a blue rectangle. The triangle represents the location of the Left Indent, and the rectangle represents the location of the First Line Indent.

- Select the text or paragraph that you wish to edit. You can select multiple paragraphs.

- Click and drag the Left indent (Blue triangle) to the right as far as you wish to indent the text. The First Line Indent (Blue rectangle) will move alongside the Left Indent
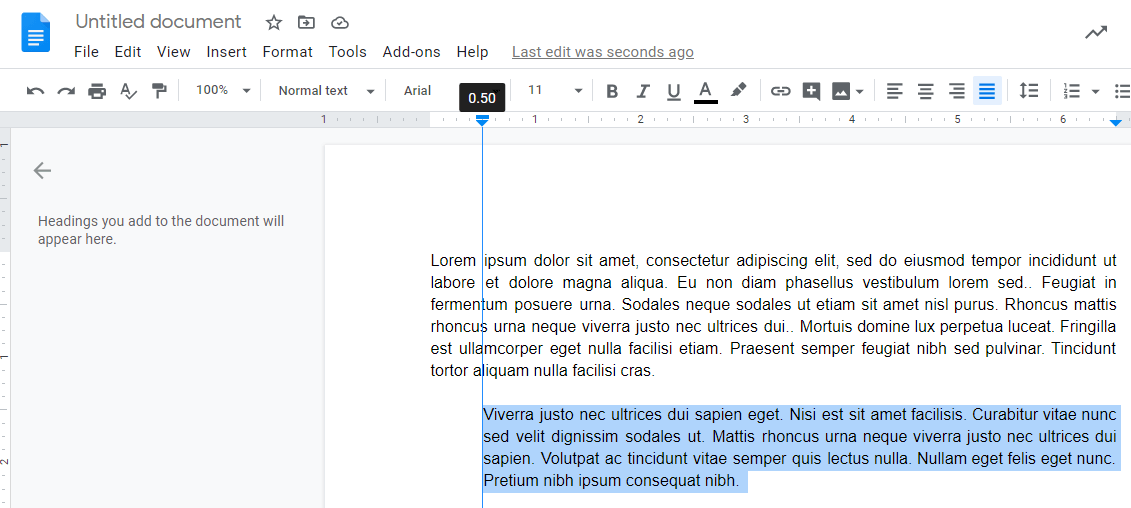
- Click and drag the First Line Indent (Blue rectangle) to move the first line to the right or to the left, depending on where you want it. You can also leave it alongside the Left Indent.
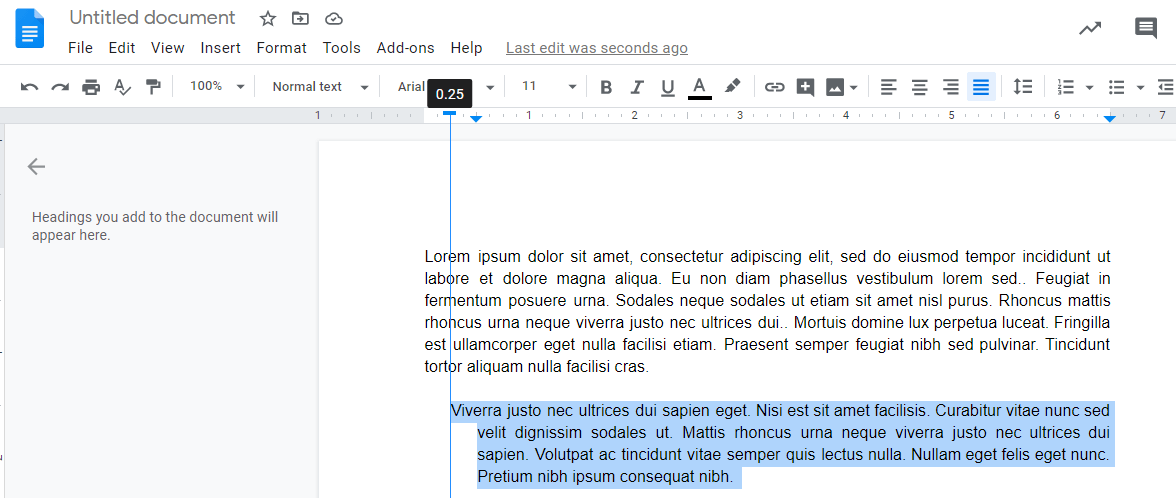
- You can also increase or decrease an indent by clicking icons located at the top right bar.
And that's it! Now start creating hanging indents on your documents to have the proper format, be it for APA, MLA or similar, it's simple and easy to use!.
If you would like to continue knowing how to be more productive and learn useful tips and tricks, why not subscribe to our email newsletter today and get 10% off your next purchase!!
How to Create a Hanging Indent in Microsoft Word
Source: https://softwarekeep.com/help-center/create-a-hanging-indent-in-microsoft-word
0 Response to "How to Create a Hanging Indent in Microsoft Word"
Post a Comment